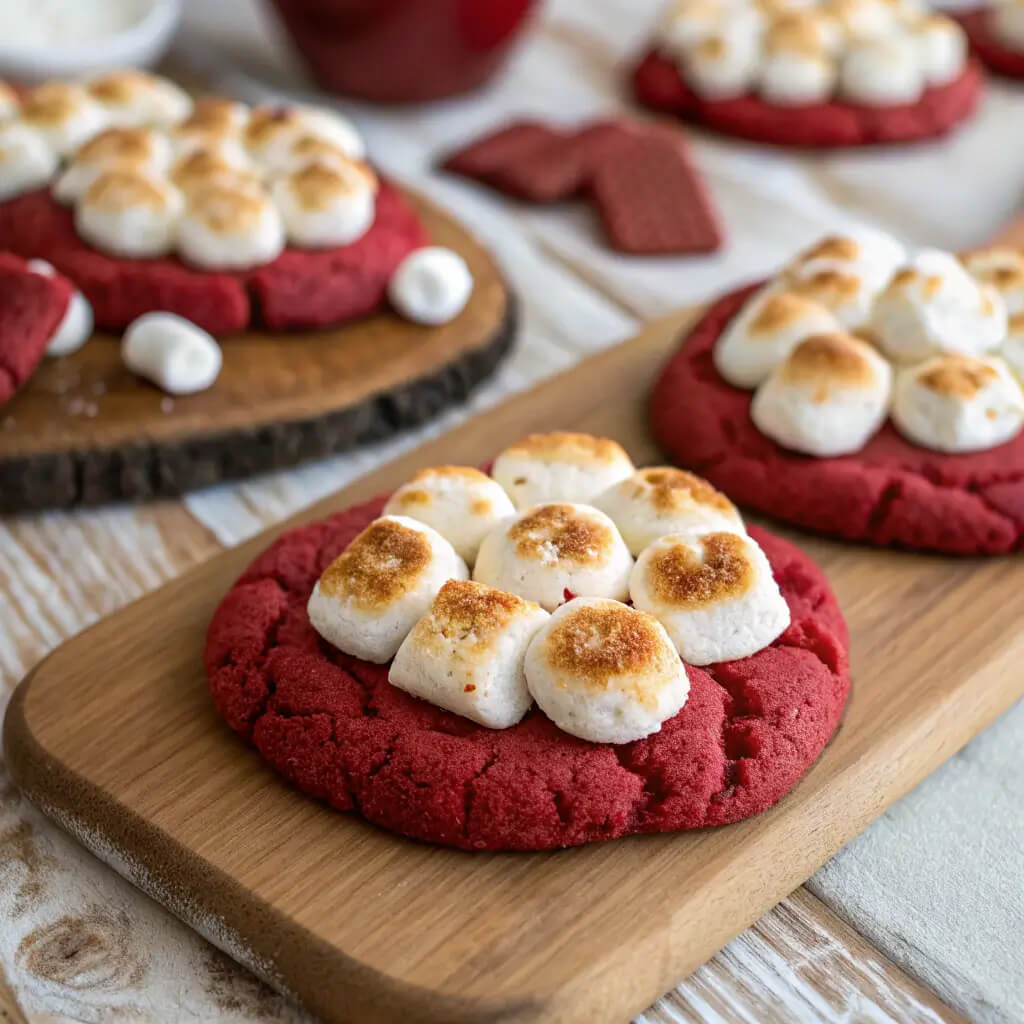
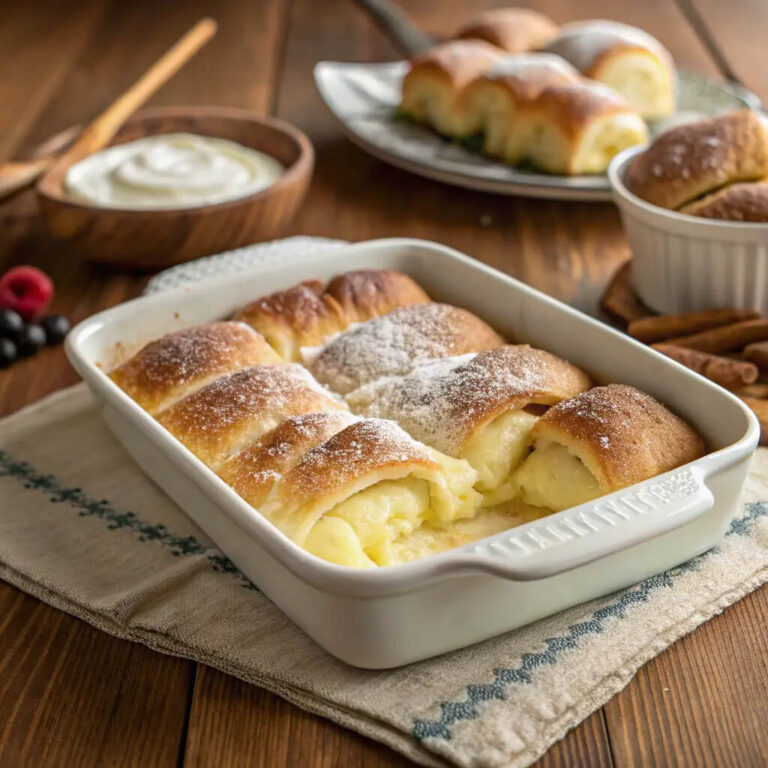
Toasted marshmallow red velvet cookies, a nostalgic twist on classic red velvet
Let me take you on a delightful journey back to my childhood, a time when the mere mention of cookies sent waves of excitement through my little heart. Picture this: a rainy afternoon, the kind that begs for warm, fluffy cookies and a good story. I was rummaging through the family recipe book (you know, the one that’s almost as old as my grandma), when I stumbled upon a handwritten note from my mom that said, “Toasted marshmallow red velvet cookies.” At that moment, the clouds parted, and I felt like I had stumbled upon a hidden treasure. To say I was intrigued is an understatement. Who doesn’t like cookies that taste like they’ve spent some quality time over a campfire?
With a little skeptical excitement, I decided to give it a whirl. I gathered all the ingredients like a culinary pirate on a quest for the ultimate booty—aka cookies. As the sweet aroma of red velvet wafted through my kitchen, my heart raced in anticipation. And when it came time to toast those marshmallows, oh boy, it was love at first bite. The nostalgic flavor of red velvet paired with a gooey marshmallow center was like a warm hug on a plate. You see, in that moment of sheer baking bliss, I re-discovered my love for cookies in a whole new way.
Now, every time I make these toasted marshmallow red velvet cookies, I’m reminded of that rainy day and the joy that comes from baking something that marries nostalgia with a bit of fun. It’s a recipe that has sparked conversations, laughter, and maybe a little drool from friends who can’t resist the temptation of that gooey marshmallow look. So roll up your sleeves, grab your apron, because I’ll let you in on this fantastic recipe that will make you feel like a kid again—just with a bit more skill and probably a few more sprinkles.
Why You’ll Adore These Cookies
- Dramatic Color: These cookies boast a show-stopping red hue that screams “look at me!” The color is practically the life of the party, and who doesn’t want vibrant cookies in their life?
- Toasted Marshmallow Goodness: I mean, really, who can resist the ooey-gooey goodness of toasted marshmallows? This recipe turns them into a delightful center that melted my heart and my tastebuds.
- Easy to Make: Don’t let the fancy name fool you. If I can create these little red delights without turning my kitchen into a disaster zone, then I promise you can too.
- Perfect for Sharing: On the off chance you feel generous, these cookies are perfect for sharing. They make you look like a baking rockstar when you bring them to parties or gatherings.
- Memory Lane: Every bite takes you back to simpler times—think picnics, sleepovers, and family gatherings filled with laughter and a bit of cookie-induced joy. Who doesn’t need a little nostalgia in their life?
Preparation & Cooking Time
- Total Time: 40 minutes
- Preparation Time: 15 minutes
- Cooking Time: 20 minutes
- Cooling Time: 5 minutes
- Servings: 12 cookies
- Calories per cookie: Approximately 150-170 calories
- Key Nutrients: Sugar: 15g, Fat: 8g, Protein: 2g
Ingredients You Need
Ready to become a cookie artisan? Here’s what you’ll need to make these beauties:
- 1 ½ cups of all-purpose flour: The foundation of our cookie—basically the little black dress of the baking world.
- 1 cup of granulated sugar: Because life is too short not to enjoy a little sweetness.
- 2 tablespoons of cocoa powder: The secret agent that adds a chocolatey twist.
- 1 teaspoon of baking soda: The little helper that gives these cookies their lift—thanks, tiny friend.
- ½ teaspoon of salt: Balance is key, my friends—this little pinch makes a big difference.
- ½ cup of unsalted butter: Melted and delicious, the stuff that makes dreams come true!
- 1 large egg: The binding force of our cookie world. Nothing fancy here—we’re just keeping it classic.
- 1 tablespoon of vanilla extract: Adds that warm hug of flavor, like a best friend on a bad day.
- 1 tablespoon of red food coloring: An absolute must for that gorgeous, vibrant color!
- 1 cup of mini marshmallows: Our gooey surprise waiting in the center like an edible treasure.
Ingredient Highlights & Variations
Let’s dive a little deeper into our colorful cast of ingredients, shall we?
- All-Purpose Flour: The versatile star of the show; you can swap in whole wheat flour if you’re feeling a bit health-conscious. But let’s be real, we’re here for cookies, right?
- Granulated Sugar vs. Brown Sugar: Brown sugar adds a caramel-like depth when used instead. Feel free to mix it up and see what happens—experimenting in the kitchen is half the fun!
- Cocoa Powder: You can get fancy here with Dutch-processed cocoa for a richer flavor. Just don’t overthink it; regular cocoa is perfectly fine too.
- Food Coloring: Fancy a rainbow? Use a mix of food colors to create a fun twist! Just keep an eye on the amounts; there’s a fine line between fabulous and no-way-I’m-eating-that.
- Marshmallows: If you’re feeling adventurous, try stuffed chocolate or even caramel candies in place of marshmallows. Who knows what tasty surprises await?
Step-by-Step Instructions
- Preheat the oven: Set it to 350°F (175°C). This is where the magic begins. A hot oven ensures cookies that are crisp on the outside and chewy on the inside!
- Mix the dry ingredients: In a bowl, whisk together the flour, cocoa powder, baking soda, and salt. Make sure it’s all combined—we want no lumps here, people!
- Cream the butter and sugar: In a separate bowl, beat the melted butter and granulated sugar until it’s light and fluffy. This is the part where I might do a little happy dance.
- Add the egg and vanilla: Toss in the egg and the vanilla extract, then mix until it’s beautifully combined. Feel free to talk sweetly to your mixture. It loves the encouragement.
- Coloring Time: Add that magical burst of red food coloring. Stir until it’s a vibrant red hue because we’re all about the theatrics here.
- Combine the mixtures: Gradually add the dry ingredients to the wet ones, mixing until just combined. Over-mixing can make cookies tough, and we want soft and chewy.
- Fold in the marshmallows: Gently fold in those mini marshmallows. You want them snugly tucked within the batter, ready for action!
- Scoop and bake: Using a cookie scoop (or two spoons if you’re fancy like me), dollop the dough onto a cookie sheet lined with parchment paper. Make sure to leave some room for them to spread.
- Time to bake: Pop them in the oven for about 10 to 12 minutes, or until the edges are firm. A little less time if you like them extra chewy! I recommend standing by in eager anticipation as the heavenly aroma fills your space.
- Cool them down: Let them cool on the baking sheet for a few minutes before transferring them to a wire rack. Patience, my friend; it’ll be worth the wait.
How to Serve It
Now that you’ve baked up some serious cookie goodness, let’s talk about how to present them like the culinary artist you are:
- Serve warm: These cookies are best enjoyed warm when the marshmallow center is gooey heaven. Trust me; your taste buds will high-five you!
- Cute Plates: Present them on a quirky plate or in a colorful tin—anything that adds a bit of flair that matches your personality.
- Garnish: Sprinkle with some powdered sugar or drizzle a bit of melted chocolate on top for that extra “wow” factor.
- Pair with milk: You can’t go wrong with a tall glass of cold milk. It’s like peanut butter and jelly—they go hand in hand.
- Get Creative: Consider serving them at gatherings like birthday parties or cozy movie nights while actively seeking compliments; I mean, you deserve a little recognition.
FAQ
- Can I replace the mini marshmallows with regular ones? Sure, but keep an eye on the size! You might need to adjust the baking time, or you could end up with an epic marshmallow explosion inside the cookies.
- Can I freeze the cookie dough? Absolutely! You can make the dough ahead and freeze it. Just thaw before baking and spread that deliciousness into the world.
- Can I use less sugar? You could, but be cautious. Sugar plays a vital role in that delightful chewiness we all crave in our cookies, so I wouldn’t cut too much!
- Can I add nuts? Of course! Walnuts or pecans would add a nice crunch. Just fold them in carefully and make sure not to make too much noise about it—don’t want to scare the cookies!
- What’s the best way to store them? Keep them in an airtight container and try not to eat them all in one sitting. But hey, if you do, I won’t judge you.
Conclusion
So there you have it, a delightful recipe for toasted marshmallow red velvet cookies that’s sure to bring a smile to your face and warmth to your heart. I encourage you to visit your kitchen, don your apron, and whip up a batch. And when you do, I’d love to hear about your cookie adventure; were they a hit at a party? Did they ignite nostalgia? Whether you go classic or put your spin on it, just know I’ll be cheering for you from my kitchen. So roll those sleeves up, get that flour flying, and let’s make some sweet memories together!