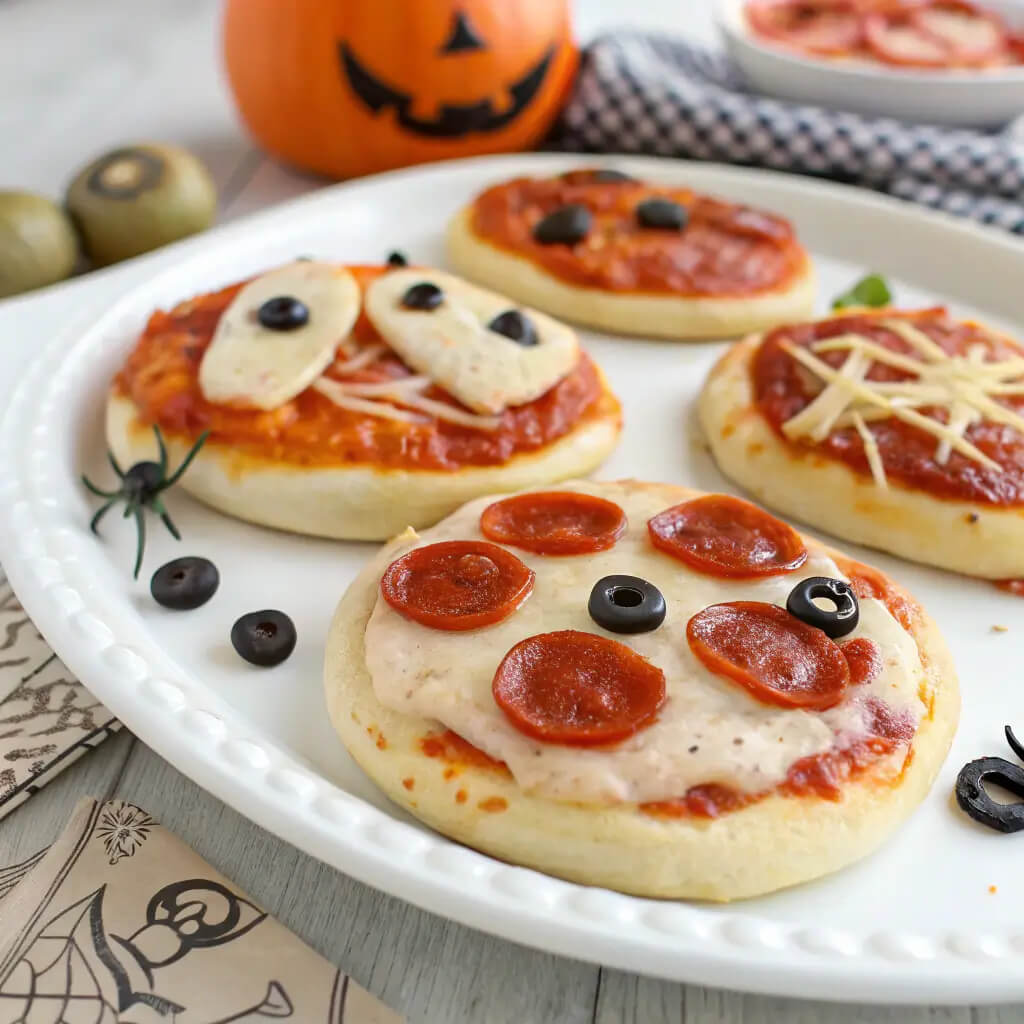
Mini pizzas with a fun “boo ya” twist for your next gathering
I’ll let you in on a little secret—my culinary adventures often lead me down hilariously uncharted paths. One such path began when a friend asked me to bring an appetizer to a potluck. So naturally, I thought, “What could be better than mini pizzas with a fun ‘boo ya’ twist?” Sounds great, right? Fast forward to the day of the potluck; I tripped over my dog while balancing a tray of these cute little pizzas. The sight of them rolling across the floor was a mix of tragic and absolutely hilarious. Spoiler alert: the dogs had a feast that day.
Despite my unfortunate kitchen mishap, the idea of crafting mini pizzas stuck with me. So, in a moment of rebellious culinary creativity, I took the plunge into creating what I like to call my ‘boo ya’ mini pizzas. The concept is so deliciously easy that even my dog could assist—well, maybe not, it’s more of a kitchen human’s job! These little bites of joy paved the way into my heart, delighting friends and family, and now they’re here to transform your gatherings into something aromatic and delicious.
Let’s face it, there’s something endearing about inviting friends over, presenting a tray of mini pizzas, and beaming with pride as they marvel at your “culinary skills.” So, grab your apron and let’s uncover the irresistible charm of these mini pizzas that will make your next gathering unforgettable.
Why This Recipe is Great
– **It’s ridiculously easy to make** – You don’t need to be a kitchen wizard to pull this off. I swear, even a toddler could help (okay, maybe a slightly older toddler).
– **It’s impressively delicious** – Don’t be shocked if your friends think you hired a personal chef. “What? You made these?!” Cue the shocked faces and resounding praises.
– **It’s tightly customizable** – Want to add pepperoni? Go for it! Prefer veggies? Oh baby, let those bell peppers shine!
– **Perfect finger food** – Grab one, two, or a whole plateful; no one’s counting. This is the kind of food that allows for indulgent snacking while mingling.
– **Great for all ages** – Young kids, grumpy teenagers, and even picky adults—everyone loves a good pizza, especially one that’s adorably sized.
Preparation & Cooking Time
– Total Time: 30 minutes
– Preparation Time: 15 minutes
– Cooking Time: 15 minutes
– Servings: Approximately 12 mini pizzas
– Calories per serving: Approximately 100-120 calories
– Key Nutrients:
– Protein: 4g
– Carbs: 15g
– Fat: 5g
Ingredients You Need
– 1 pack of pita bread – Yup, the superhero base for these mini pizzas.
– 1 cup pizza sauce – Because what’s a pizza without its saucy charm?
– 1 ½ cups shredded mozzarella cheese – The glue that holds our dreams together.
– 1 cup assorted toppings (pepperoni, olives, bell peppers, mushrooms) – Get ready to party with your favorite flavors.
– 1 tablespoon Italian seasoning – A little sprinkle to send flavor fireworks off in your mouth.
– Olive oil for brushing – Just a dab here and there for that extra sheen and deliciousness.
Ingredient Highlights & Variations
– **Pita Bread**: Don’t underestimate this little guy—it’s sturdy, holds toppings well, and makes for the perfect crust. Plus, it’s often less messy than traditional pizza dough.
– **Pizza Sauce**: You can buy a great jar or whip up your own if you’re feeling adventurous. I mean, who doesn’t love bragging about their homemade sauce?
– **Cheese**: Mozzarella is the classic choice, but feel free to mix it up! Add some cheddar for a sharp kick or a sprinkle of feta for that Mediterranean vibe.
– **Toppings**: This is where the magic happens. You could do a Hawaiian twist with pineapple and ham, or even go rogue with some BBQ chicken.
– **Italian Seasoning**: A mix of dried herbs can elevate the flavor to new heights. Pro tip: feel free to experiment with spicy crushed red pepper if you’re up for a little heat in your life.
Step-by-Step Instructions
1. Preheat your oven to 400°F (200°C). This is where the anticipation begins; let the heat build, like the excitement when you see a pizza place sign.
2. Place your pita breads on a baking sheet. Lay them out like they’re sunbathing by the beach—spacious and ready.
3. Brush each pita bread lightly with olive oil. This will keep them nice and golden—just like me when I eat too many pizzas.
4. Spread a spoonful of pizza sauce on each pita. Go wild, let your inner artist paint the perfect pizza canvas. Swirls and swoops are totally allowed.
5. Sprinkle a generous amount of mozzarella cheese over the sauce. Aim for maximum cheesiness—there’s really no such thing as too much cheese in this equation.
6. Now comes the fun part—add your toppings. Get creative! Channel your inner pizza Picasso and layer those toppings until they look fabulously artsy.
7. Sprinkle a bit of Italian seasoning on top before sliding them into the oven. It’s like giving your mini pizzas a final fashion statement.
8. Bake for 10-15 minutes, until the edges are slightly crisp and the cheese is bubbling. This is the aroma that makes friends and family flock to your kitchen like moths to a flame.
9. Remove from the oven and let cool for just a minute, unless you want to engage in a fiery battle of enchanting flavors straight out of the oven.
10. Slice, serve, and bask in the glory of your mini pizza creations.
How to Serve It
– Serve these with a smile, because good food deserves a happy face.
– Try garnishing them with fresh basil or a drizzle of balsamic glaze for that gourmet touch.
– Pair with a fresh salad or crunchy veggie sticks for a fun appetizer combo.
– Throw some toothpicks in to make them even more bite-sized and fun to eat.
– Set the mood with some upbeat music while your friends enjoy these tasty little bites; it’s all about the vibe, you know?
FAQ
– **Can I use regular bread instead of pita?** Absolutely! Just keep in mind that you might end up with mini open-faced sandwiches rather than pizzas. It’s all about perspective.
– **Can I make these ahead of time?** Sure, just prep the toppings and store them in the fridge. When it’s party time, build and bake your mini pizzas right before serving.
– **What if I don’t have any pizza toppings?** No problem! Use whatever you have on hand. Leftover chicken? Toss it on there. Random veggies languishing in your fridge? They’re game too!
– **Can I freeze these mini pizzas?** Technically yes, but you might have to deal with some sad, floppy pizza. I recommend enjoying them fresh for maximum deliciousness.
– **Are they super cheesy?** Is that a trick question? Yes, my friend, yes.
Conclusion
So there you have it—my quirky journey into the land of mini pizzas with a fun ‘boo ya’ twist! I hope you feel inspired to put on your apron and create these delightful bite-sized wonders at your next gathering. They’re simple, delicious, and guaranteed to garner the kind of compliments that make you feel like a culinary rock star. Remember, cooking is all about fun, creativity, and a smidge of messiness. After you whip these up, I’d love for you to come back and share your own adventures or any quirky variations you tried. Happy cooking, my friend; can’t wait to hear about your pizza triumphs!


